External Apps Tutorials
Table of Contents
Nearpod
Overview
Nearpod is a web application that is used to create interactive presentations. Educators may create Nearpod content for asynchronous or synchronous learning experiences. Nearpod offers a variety of options for adding interactive content to presentations, including quizzes, polls, videos, collaborate boards and more.
Video Tutorial
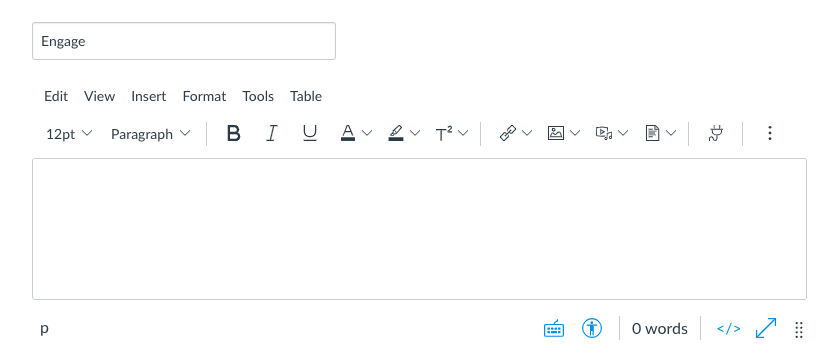
Tech Update: The video above demonstrates how to embed Nearpod into Canvas using a previous version of the content editor. To access the HTML editor in the new content editor, select the Switch to html editor icon located at the bottom right corner of the body field (see image below). This icon toggles between the rich content editor and the htlm editor.
Create Nearpod Content
Open Nearpod. In a web browser, navigate to nearpod.com.
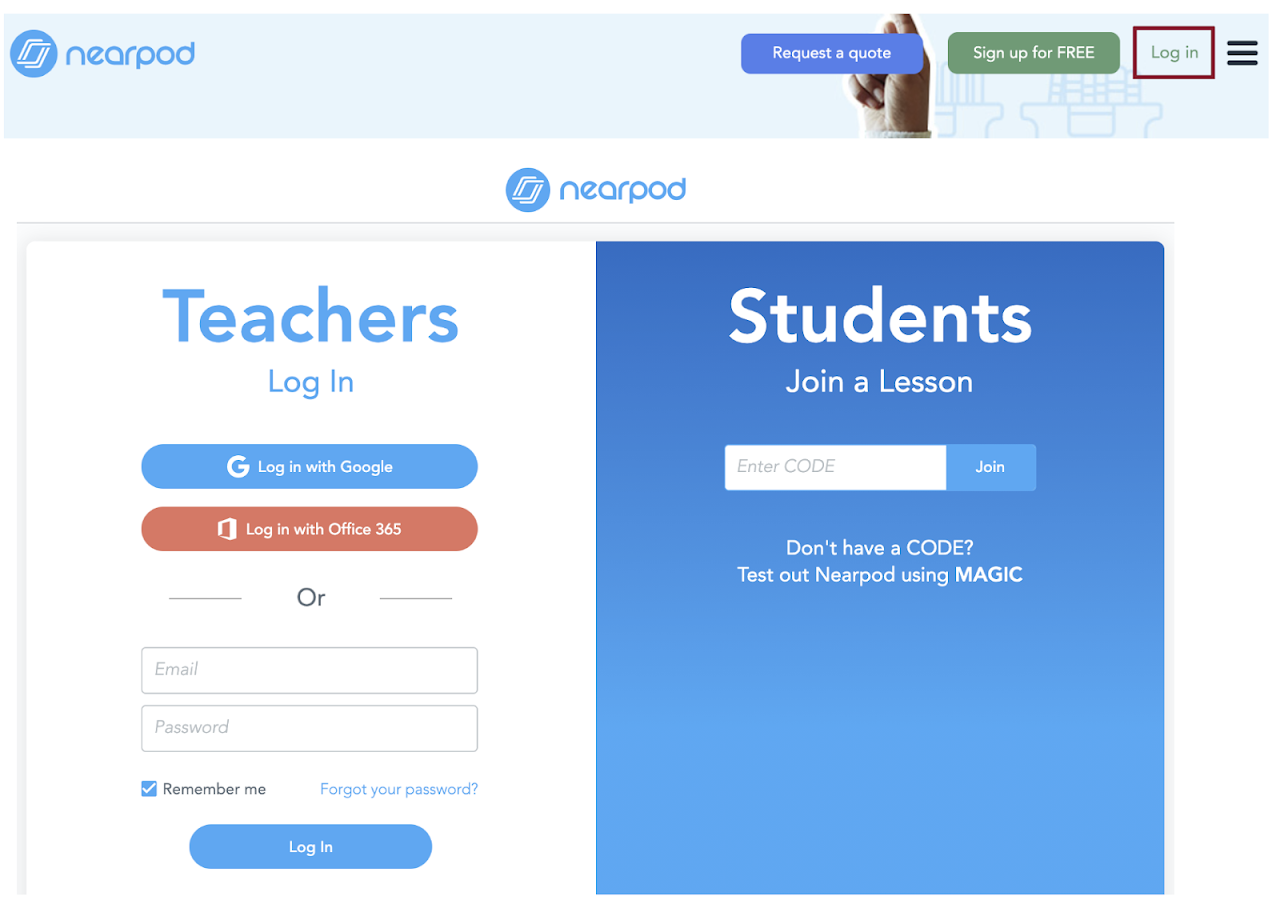
Login or Sign Up. For existing accounts, click the Log in button. Click the Sign up for free button to create an account.
If the lesson is being shared with students using a join code, students will click the Log In button and enter the provided join code in the field.
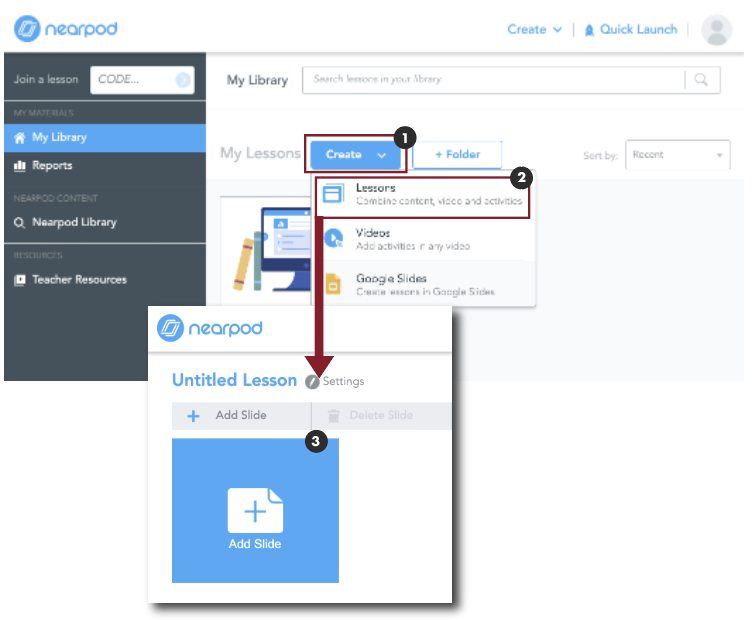
Create Lesson. Click the Create button [1] and select the Lessons option [2].
Title the Lesson. Click the Untitled Lesson text and enter a new title.
Lesson Settings. Click the Settings link to view and update lesson settings.
Add Content. Click the Add Slide icon [3] and choose a template for the desired content.
In this example, we'll be creating a Collaborate Board. The Collaborate Board activity allows students to add posts and respond to their peers in real time, similar to a discussion board.
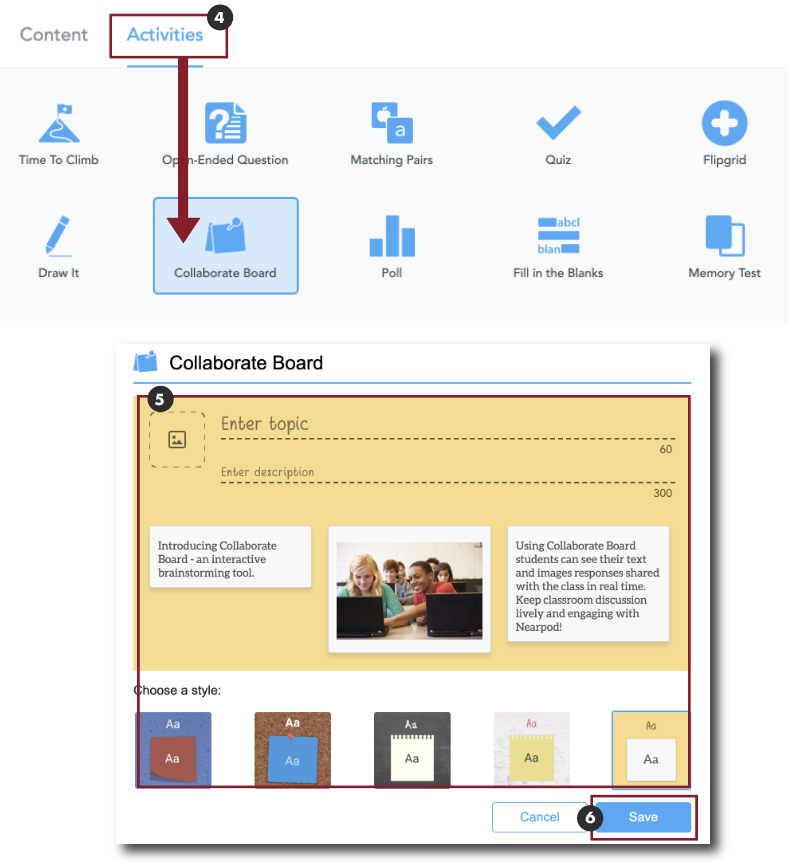
To create a Collaborate Board click the Activities tab and click the Collaborate Board icon [4].
Collaborate Board Details. Add the following details to the new Collaborate Board [5]:
Image - choose an image that relates to the discussion board
Topic - enter a topic for discussion
Description - add an additional information related to the topic. This may be used to provide discussion questions
Choose a style for the discussion board
Save Collaborate Board. Click the Save button to create the activity [6].
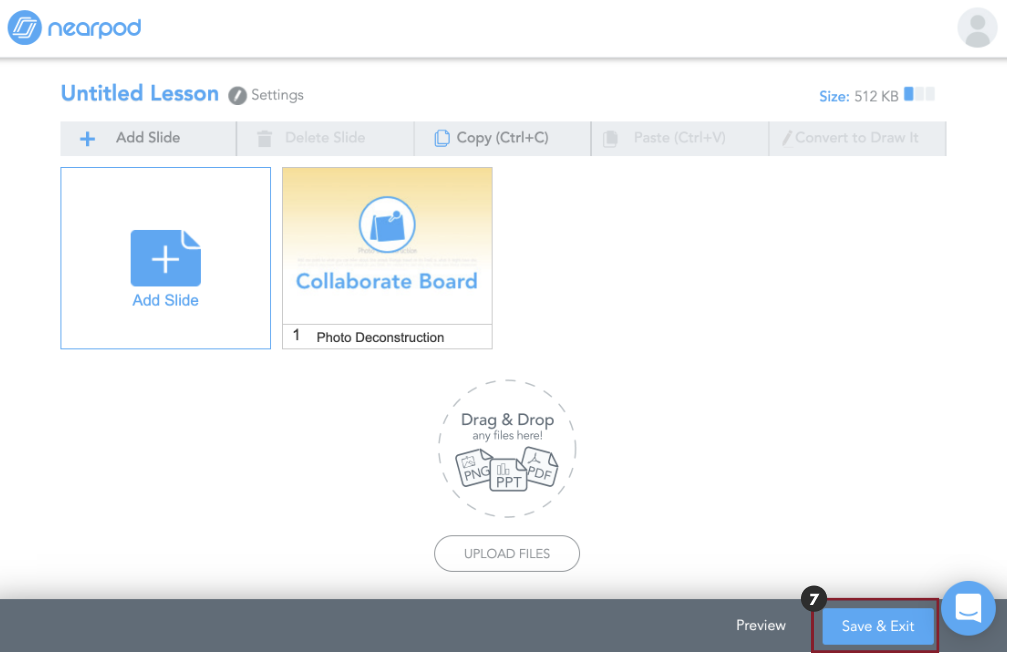
Preview Lesson. Preview the lesson to review the lesson [7].
Save & Exit. Click the Save & Exit button to save the changes.
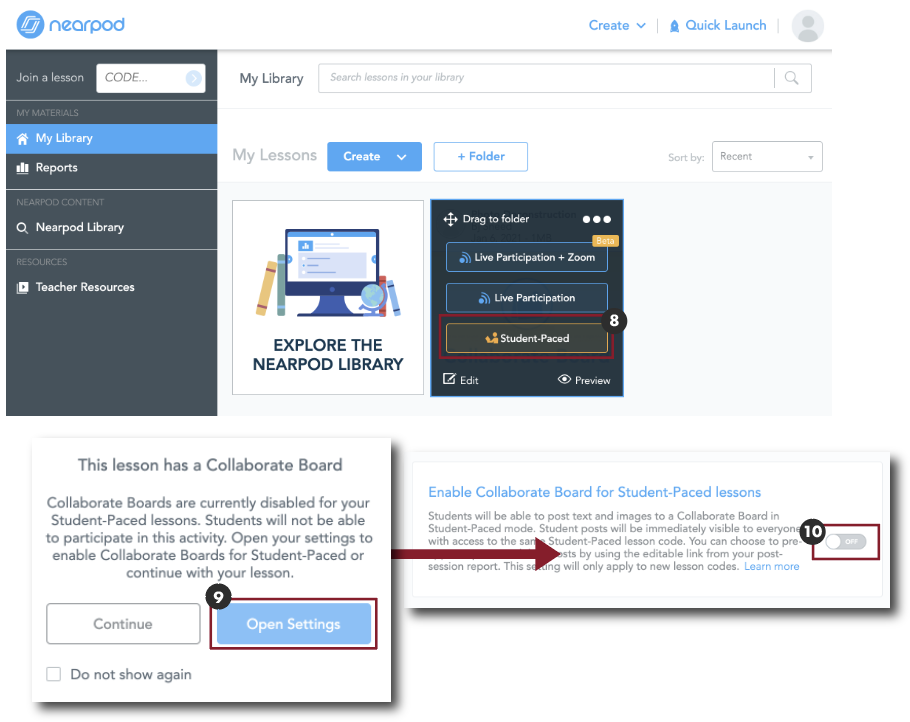
Sharing Lessons. Nearpod content and activities may be shared synchronously or asynchronously. To share an activity asynchronously, navigate to the activity, hover over the lesson to view the sharing options and select the Student-Paced option [8].
Lesson Settings. Certain activities may require additional settings to be enabled. For example, when creating a Collaborate Board for a Student Paced lesson the following message may appear:
Collaborate Boards are currently disabled for your Student-Paced lessons. Students will not be able to participate in this activity. Open your settings to enable Collaborate Boards for Student-Paced or continue with your lesson.
To enable Collaborate Boards for Student-Paced lessons, click the Open Settings option [9], scroll down to the Enable Collaborate Board for Student-Paced lessons and click the toggle button to On [10].
Share Nearpod Content
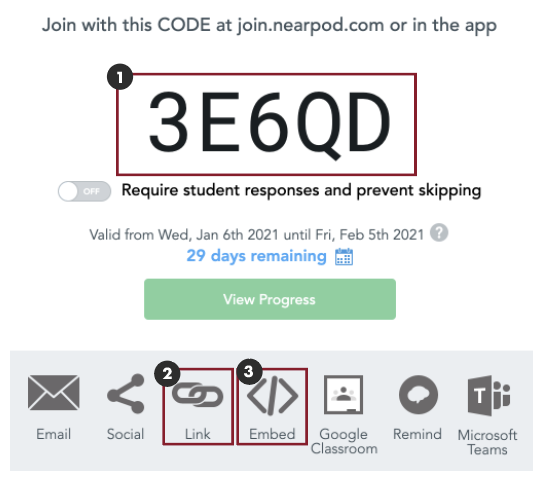
Sharing Options. Once the settings have been updated, navigate back to the lesson. Locate the lesson and click the Student-Paced option. Since the option was chosen in a previous step, a join code should appear as active. Select the active lesson, and click the Share button. There are several sharing options:
Share Join Code [1]. Copy the join code and share the code with students. To access the activity, students will be required to navigate to nearpod.com , login and enter the join code.
Share Link [2]. Copy the URL from the Share Link option and paste the link into Canvas or send the link to students so they may access the activity without a join code.
Embed Code [3]. Click the Embed option to copy the embed code. Paste them embed code into Canvas to embed the Nearpod activity into a Canvas activity.
